By connecting Fresh Projects to Zapier, you can automatically push key updates—such as a new Lead, Project, Client, or Employee being added—into other systems like HubSpot, Slack, Google Sheets, Microsoft Teams, email tools, or finance platforms, ensuring everything stays in sync without manual admin.
The Fresh Projects Zapier integration can be viewed at: https://zapier.com/apps/fresh-projects-ca1/integrations
What the integration supports
Currently the integration supports a one-way flow from Fresh Projects to the 3rd party for:
- New Project – Retrieves a list of new projects created since the last request
- New Lead – Retrieves a list of new leads created since the last request
- New Company – Retrieves a list of new companies (clients) added since the last request
- New Employee – Retrieves a list of new employees added since the last request
- Updated Project – Retrieves a list of projects that have changed their project status or pipeline stage since the last request
We limit responses to only share any new items created since the past query (ie changes only)
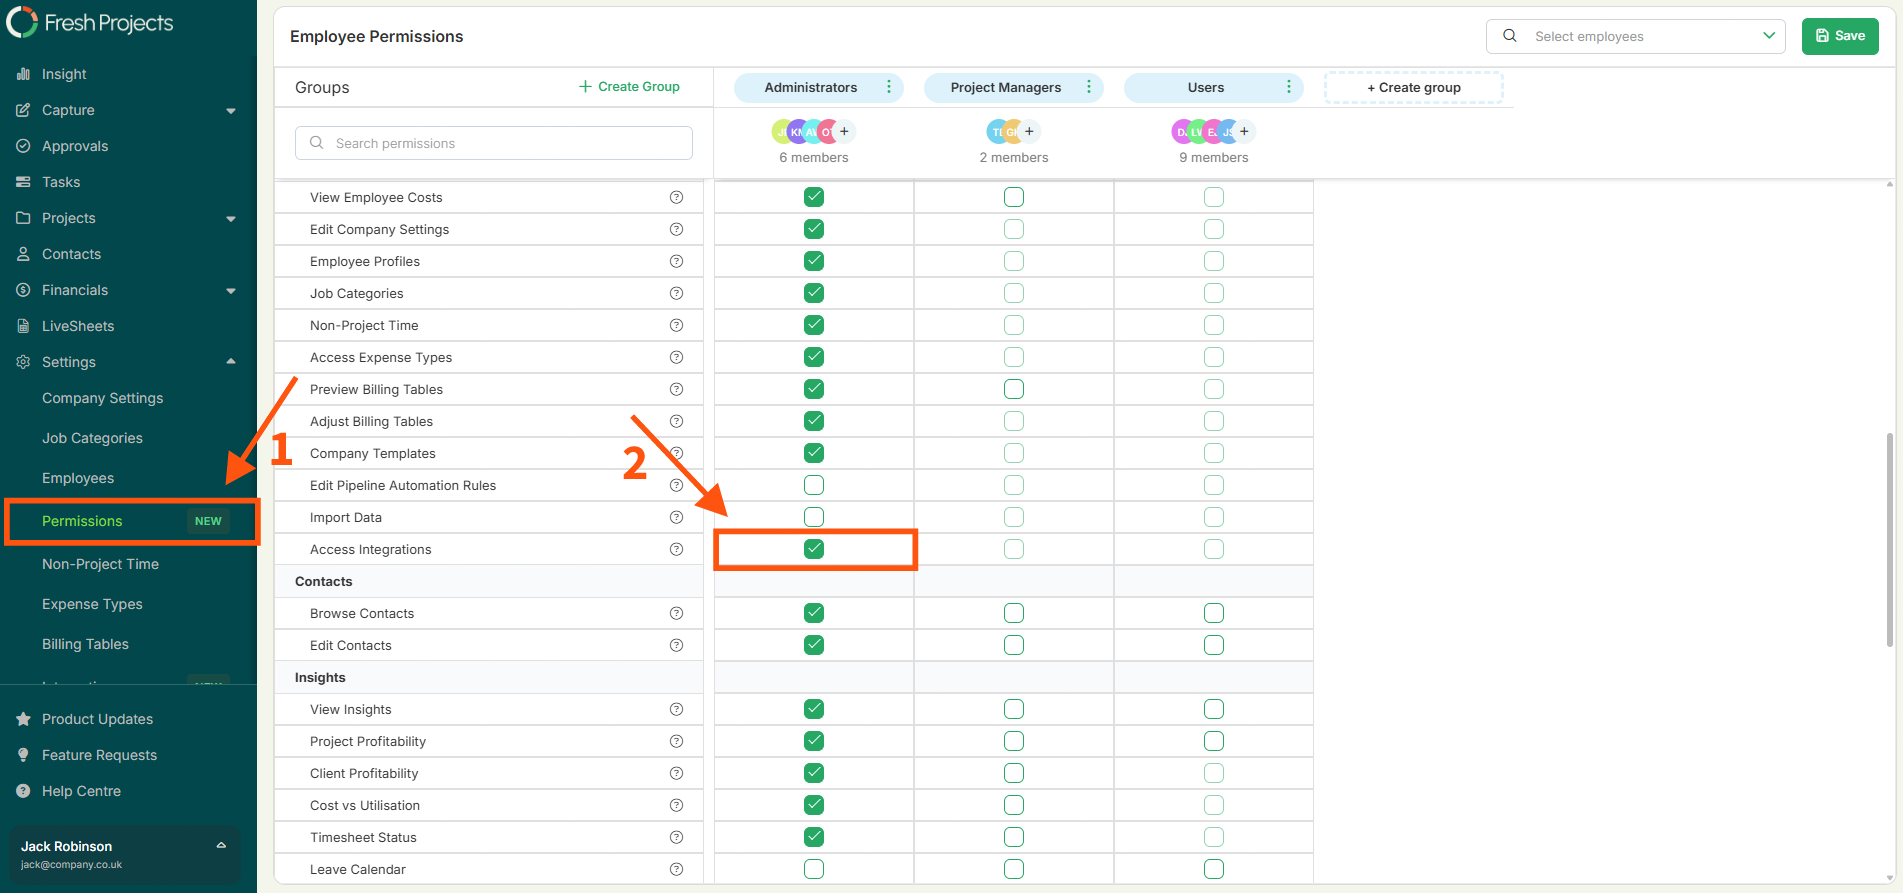
Before you start: enable the Access Integrations permission
The Integrations menu is only visible to users whose role has the Access Integrations permission enabled. Users will not see the menu until the permission is granted.
To enable it:
- Go to Settings > Permissions
- Select the role you want to grant access to
- Tick Access Integrations
- Save
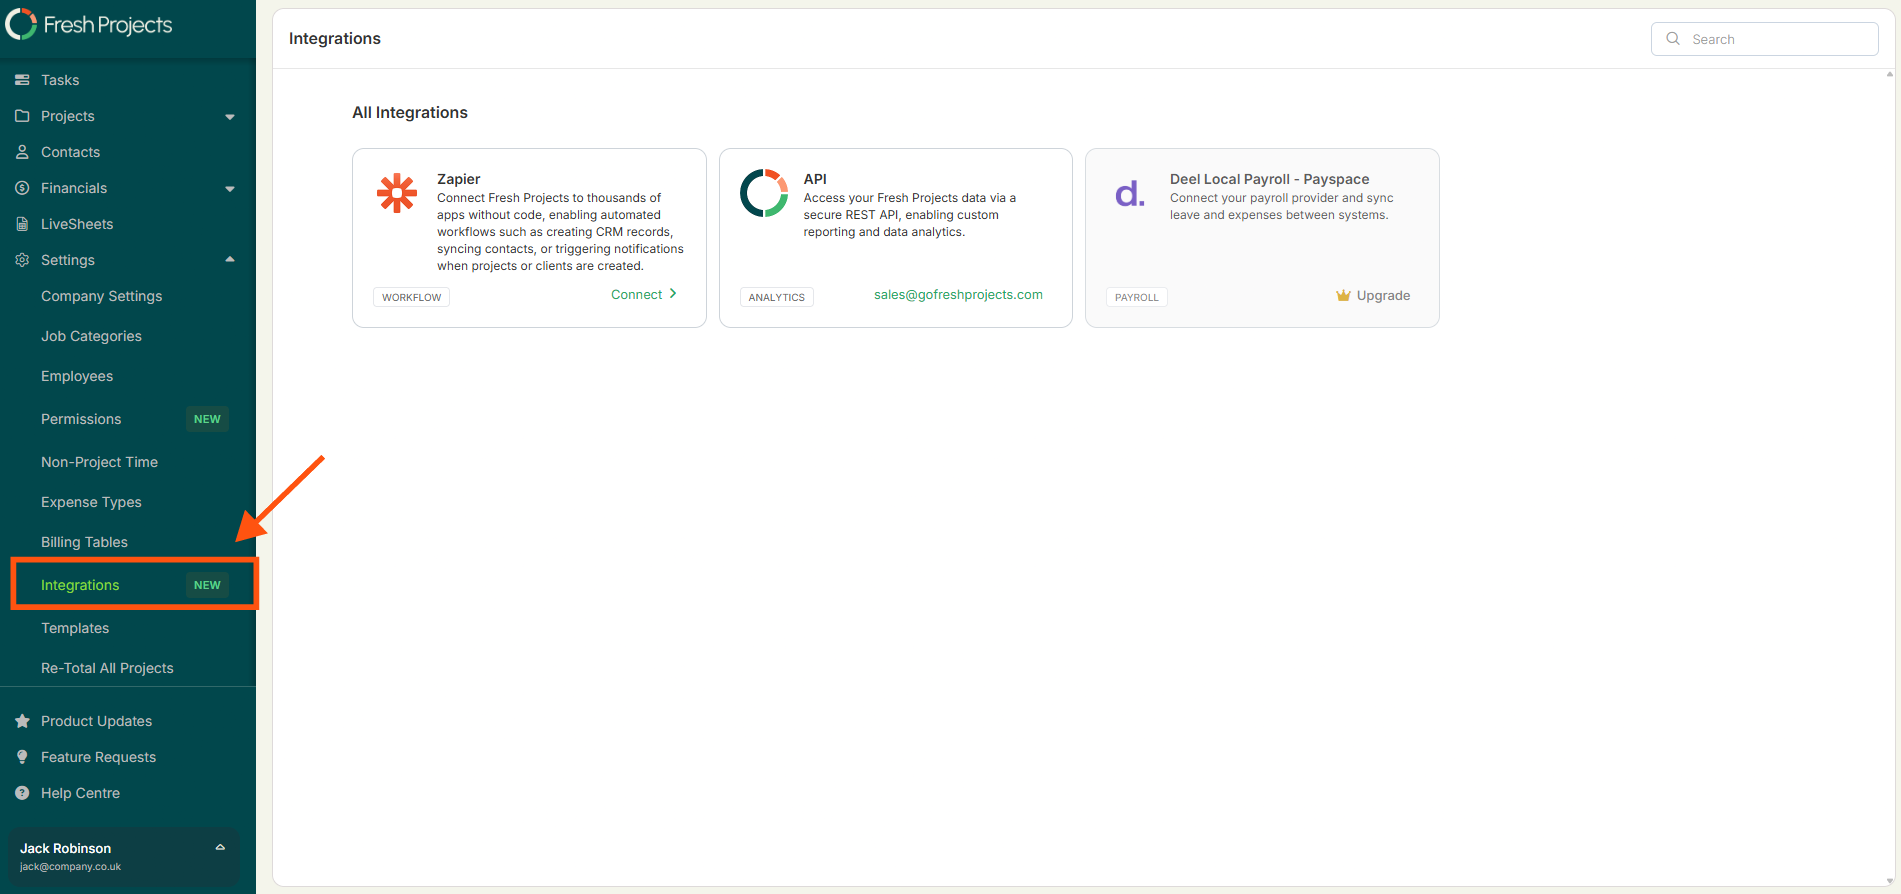
Step 1: Open the Integrations menu
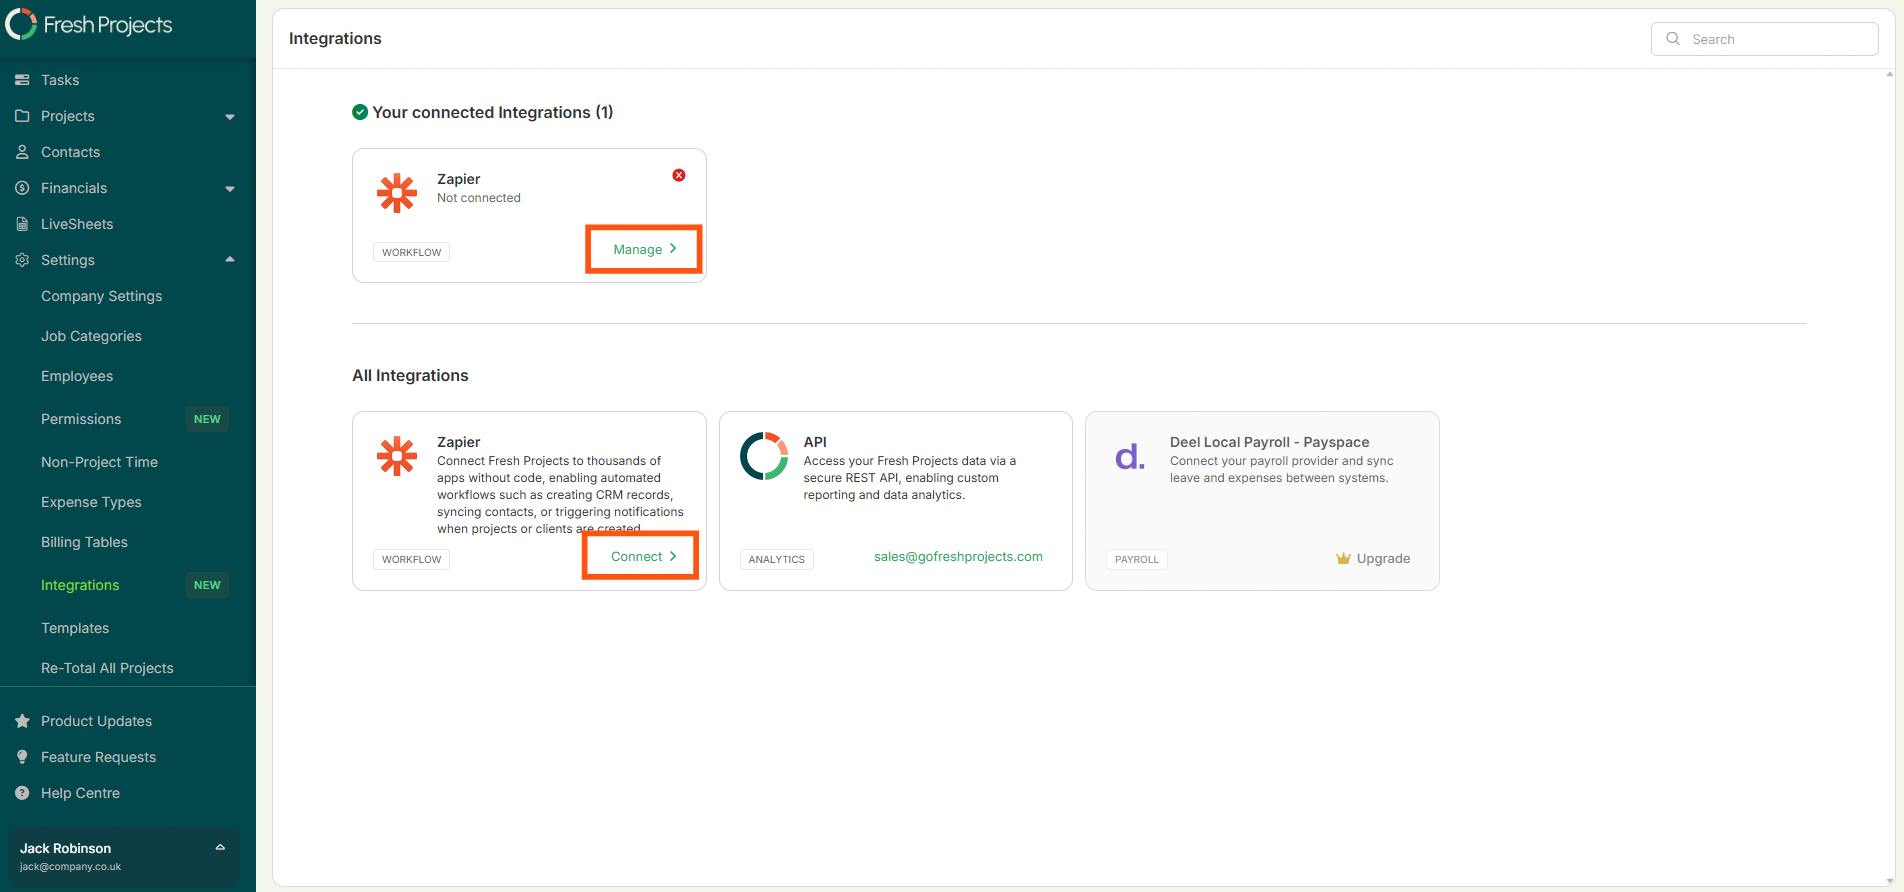
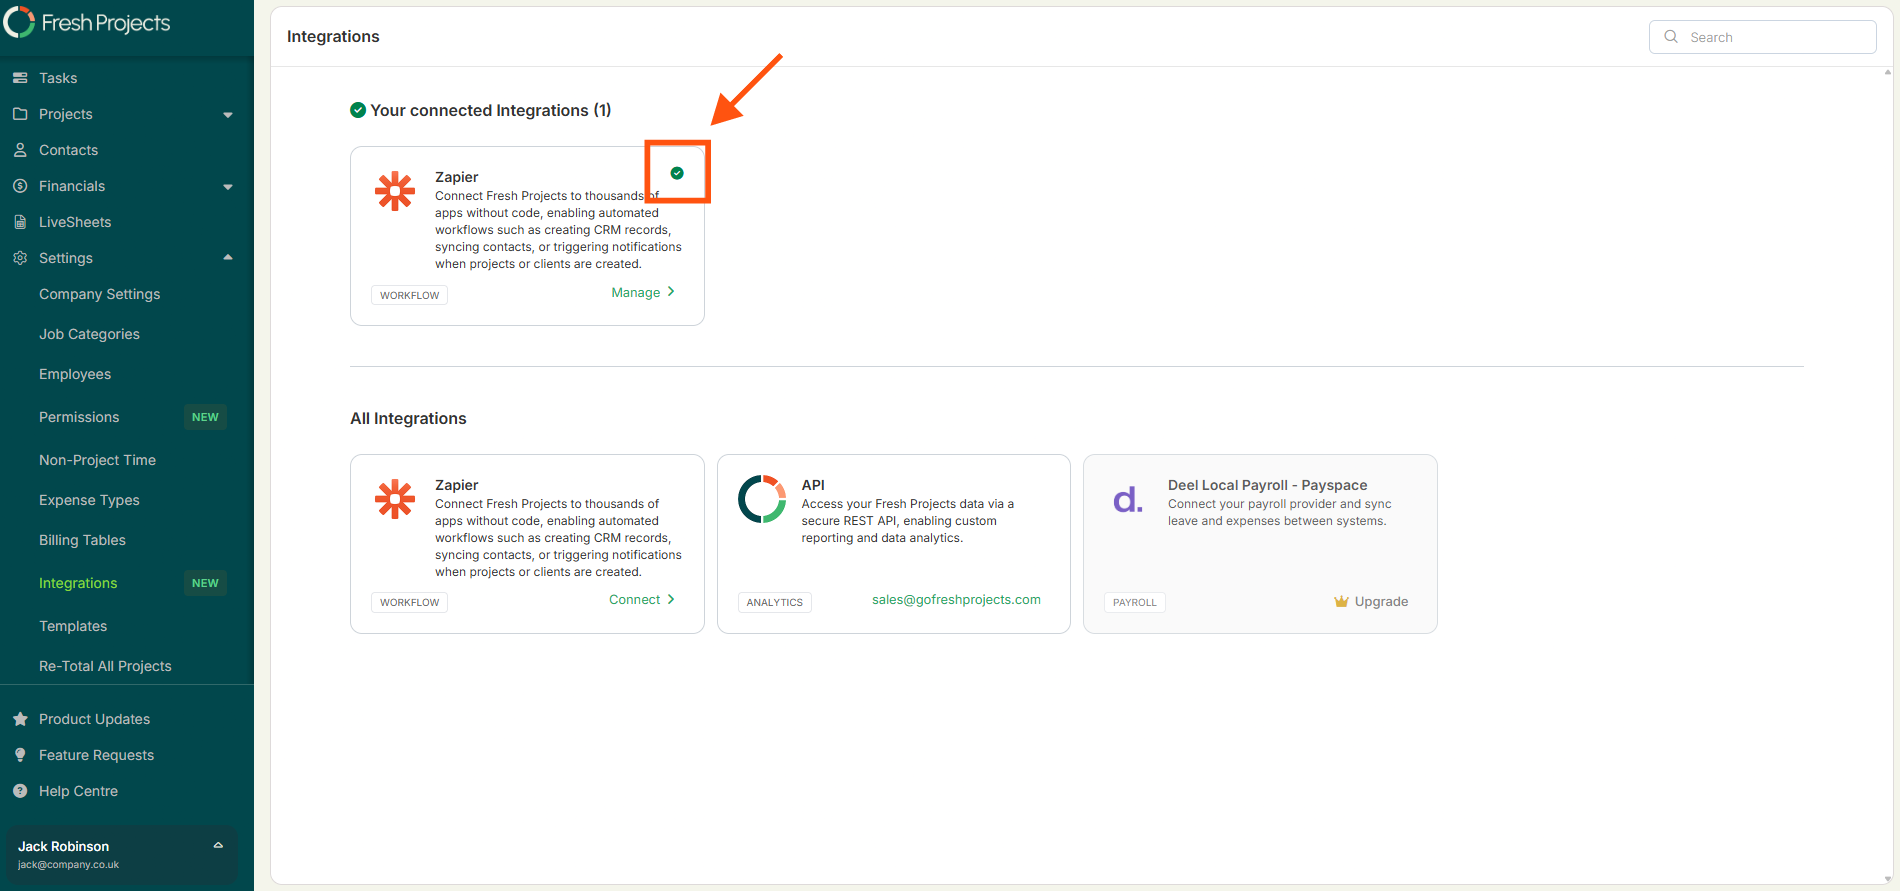
Navigate to Integrations from the main menu. You'll see your available integrations listed.
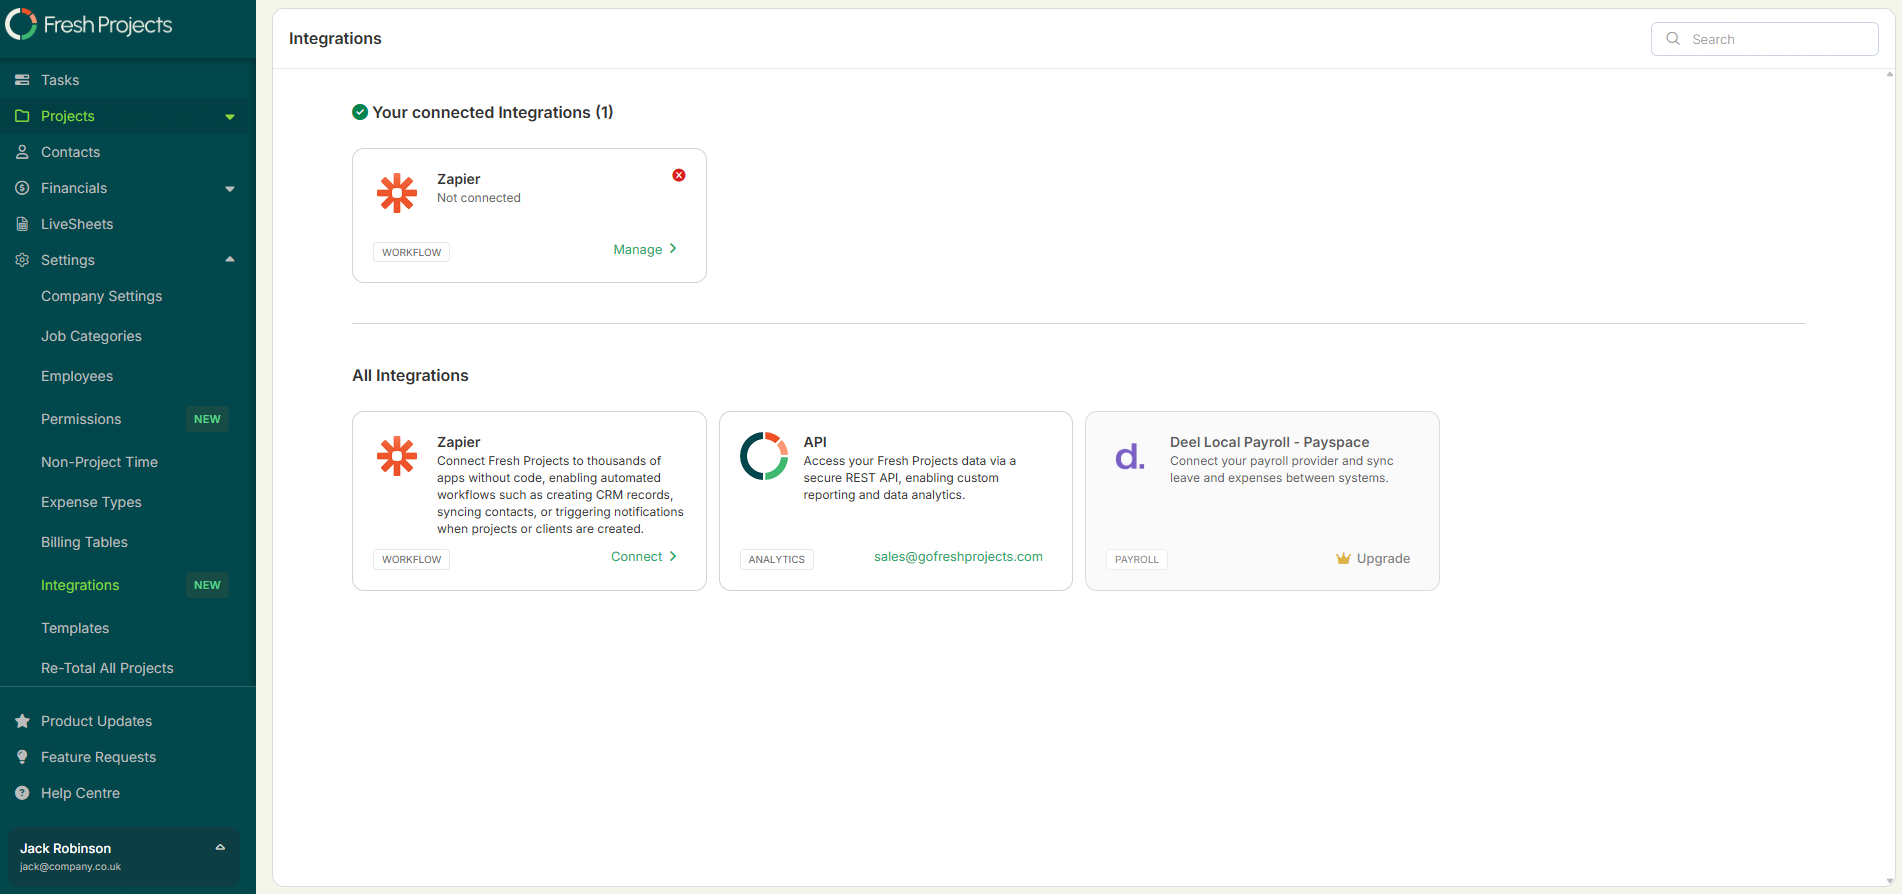
If connected previously. Each integration shows a status indicator:
- Tick – currently connected
- Cross – currently disconnected
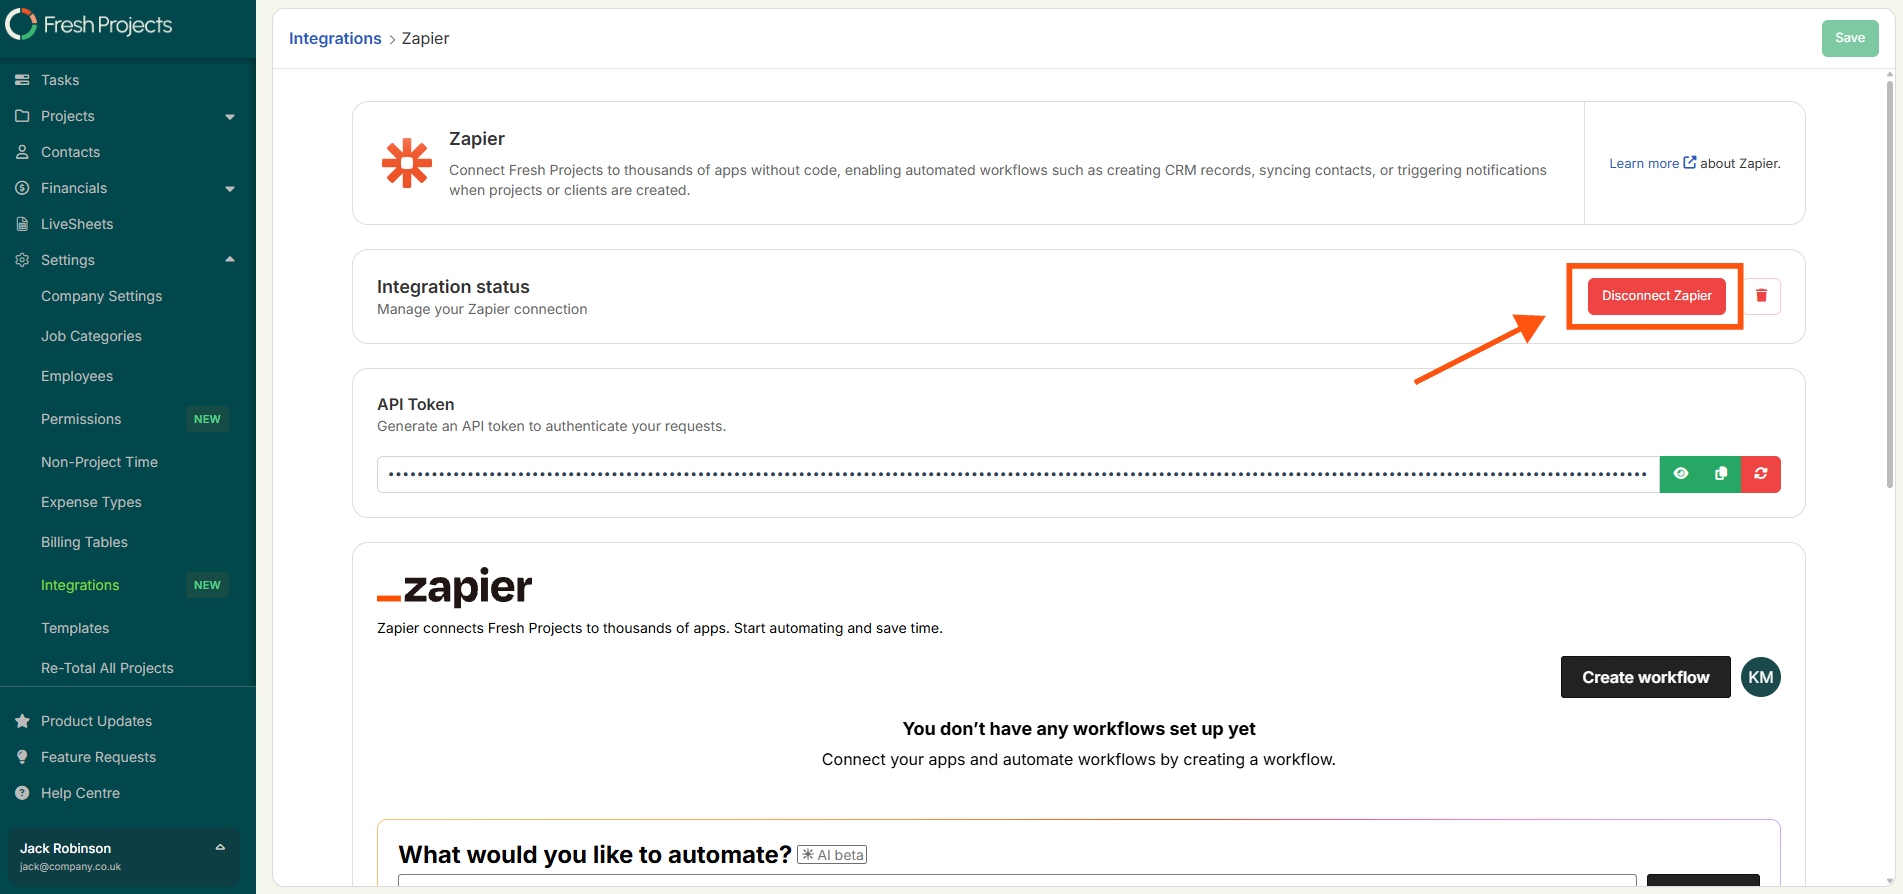
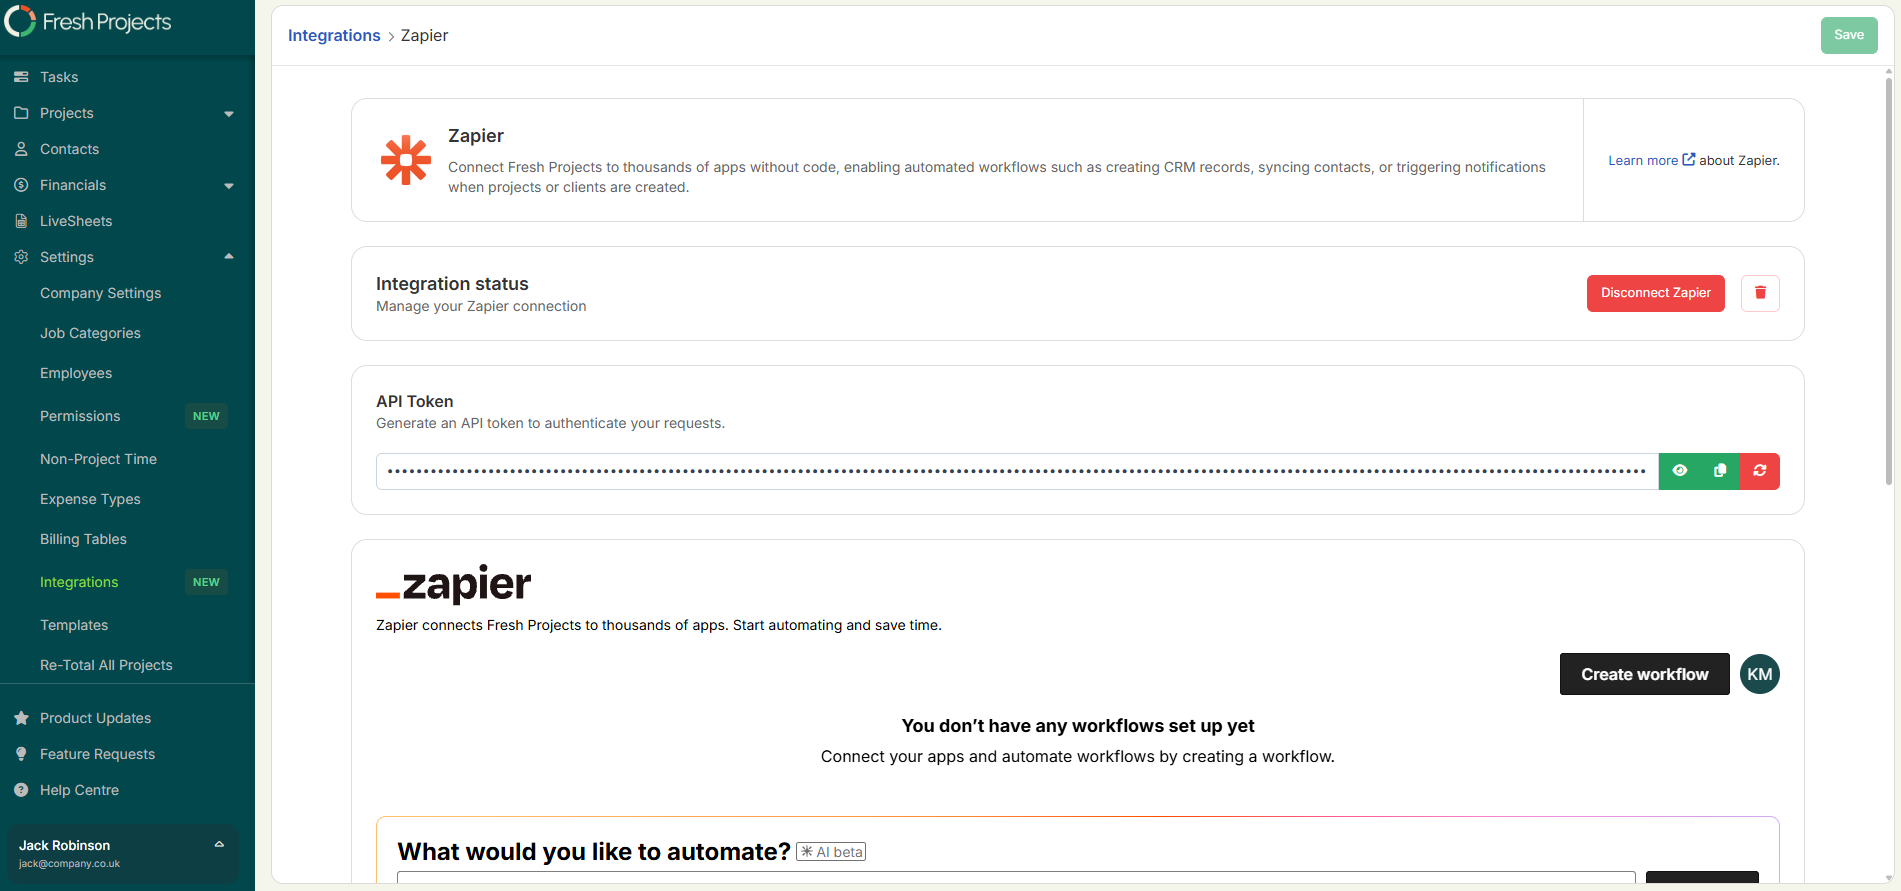
Step 2: Connect Zapier and generate your API token
- On the Zapier tile, click Manage / Connect.
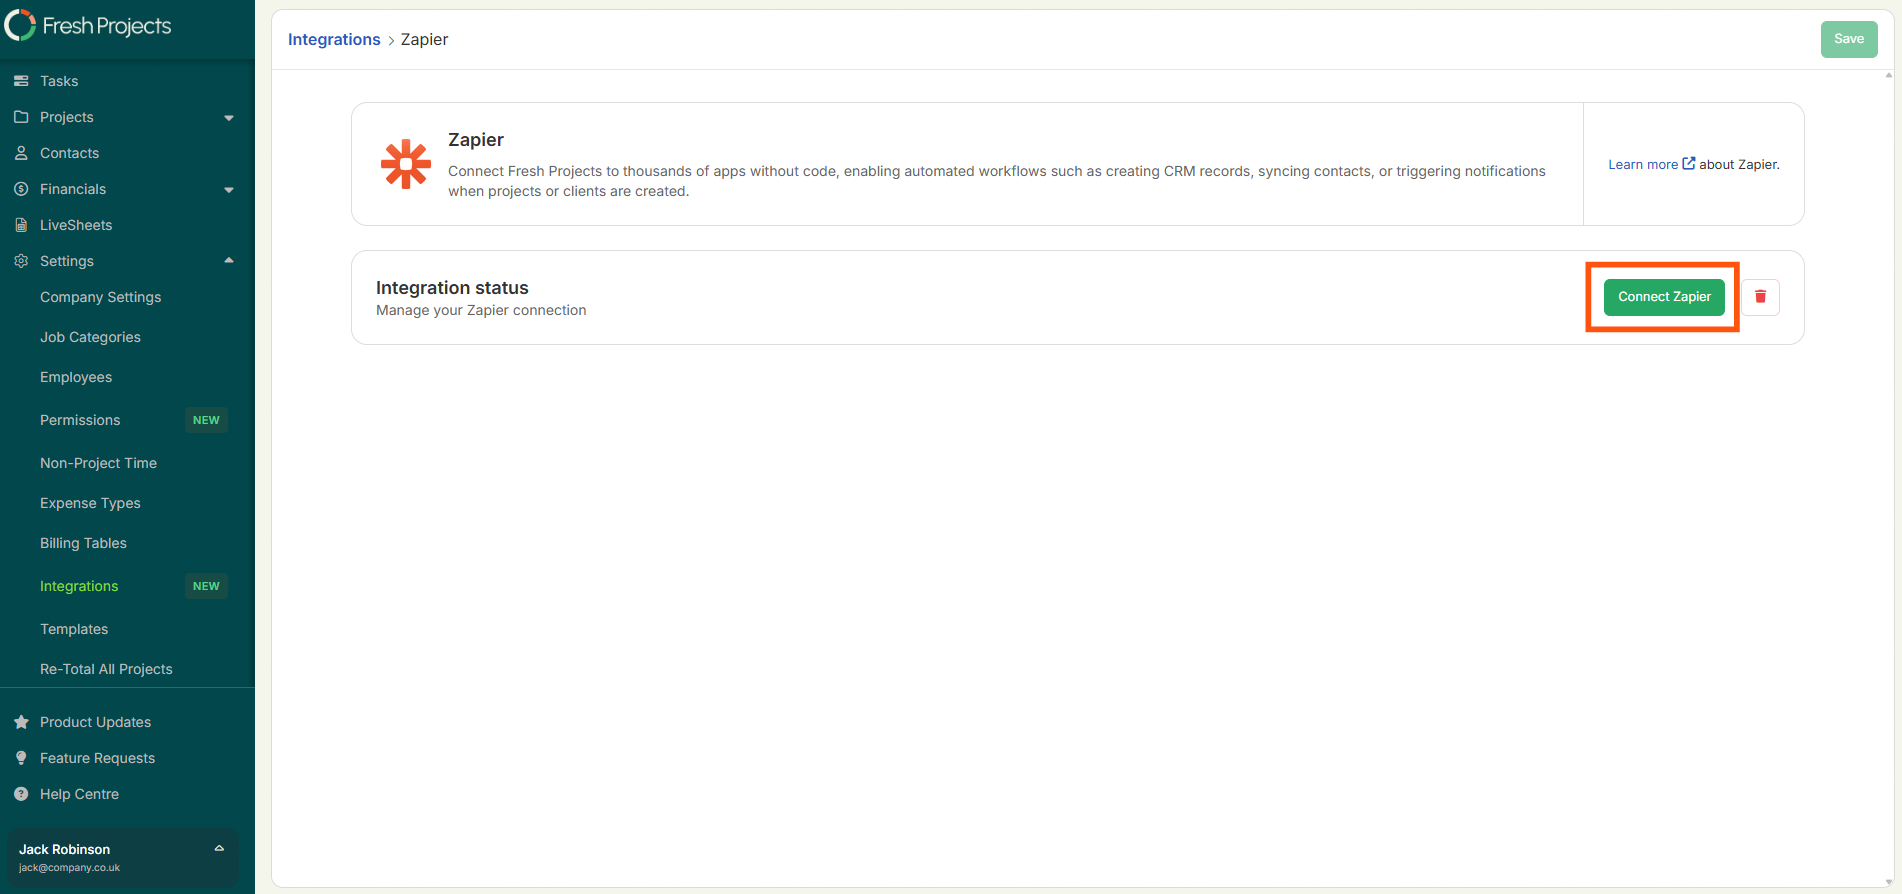
- Click Connect Zapier
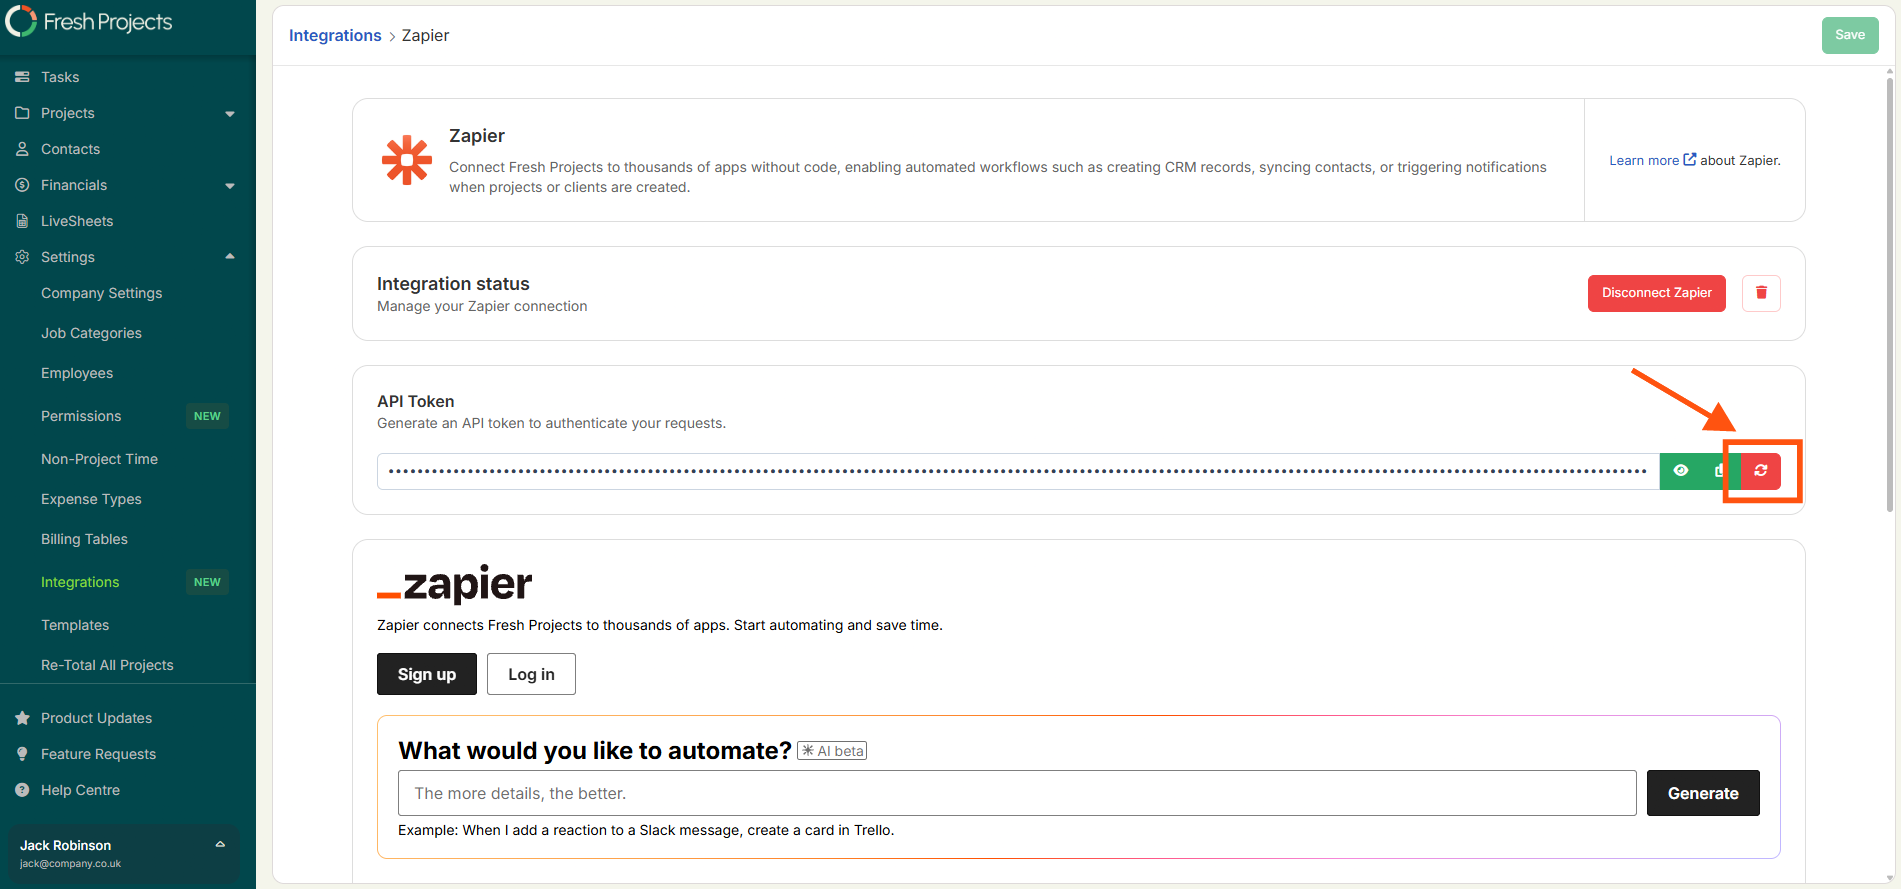
An API token is generated automatically. You can view and copy it from this screen.
Rotating your key: If your token is ever compromised, or you simply need to issue a new one, click Rotate Key. This generates a fresh token and invalidates the old one.
Step 3: Authorise Zapier
From the same screen, click Log in to sign in to Zapier. A Zapier login window opens — sign in with your usual method (email and password, Continue with Google, etc.).
Once you've signed in, your Fresh Projects account is authorised with Zapier and you can close the window.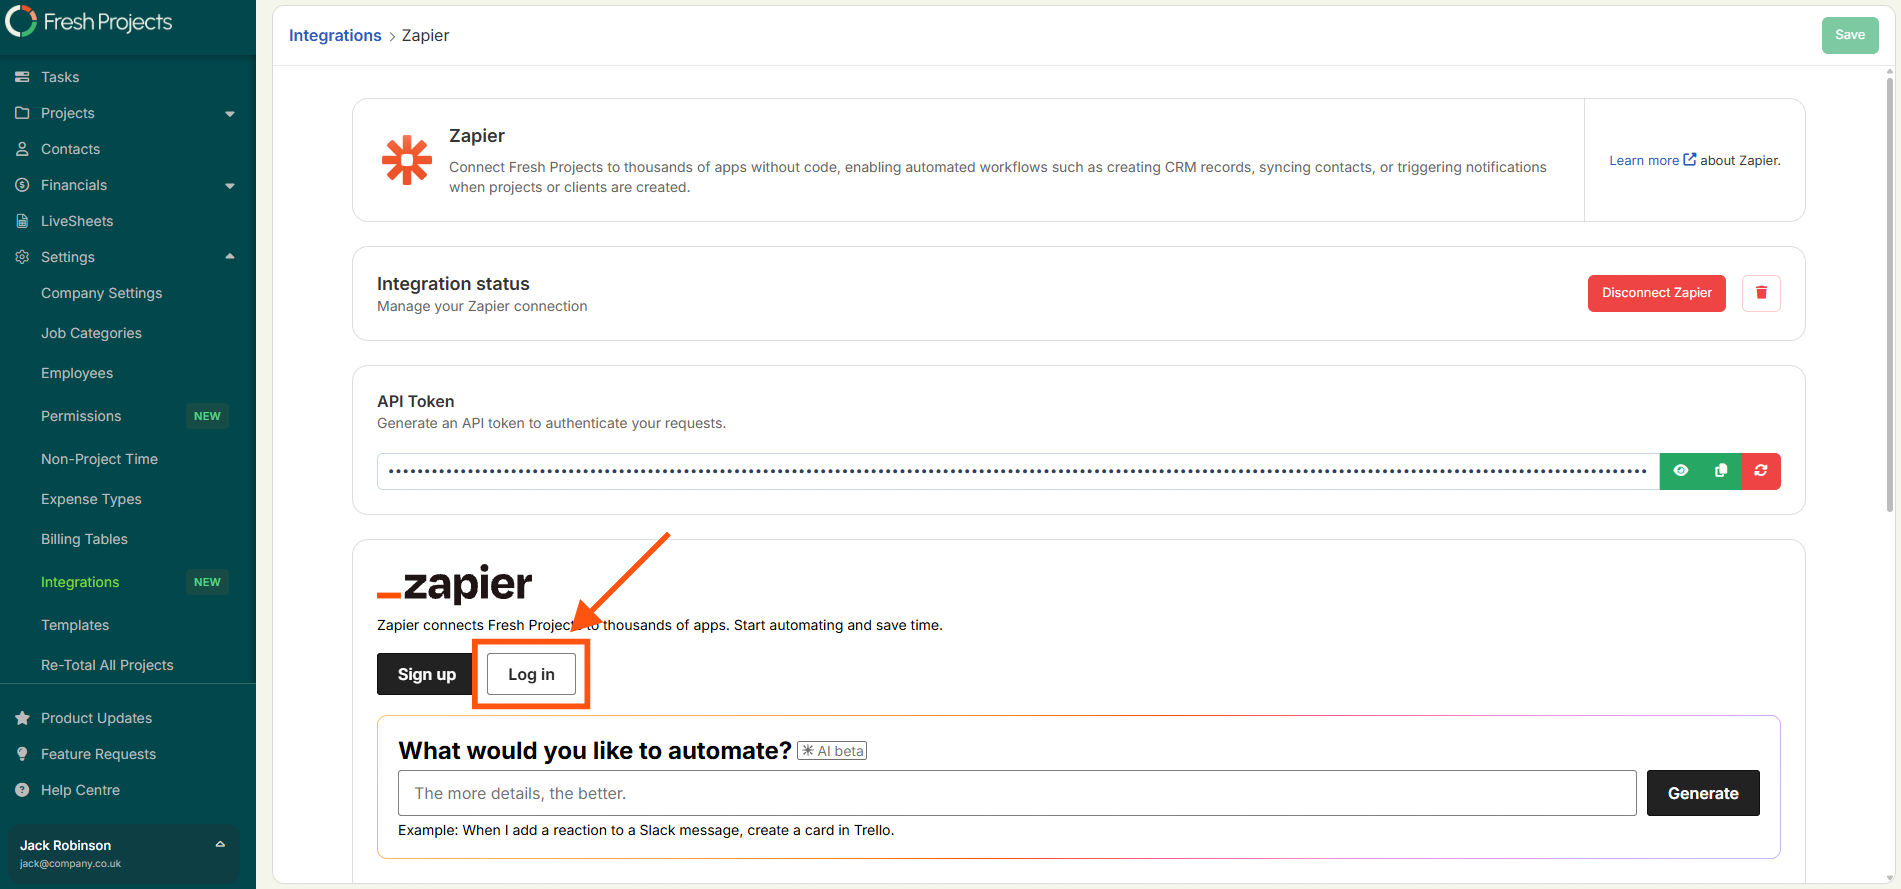
Step 4: Build your first Zap
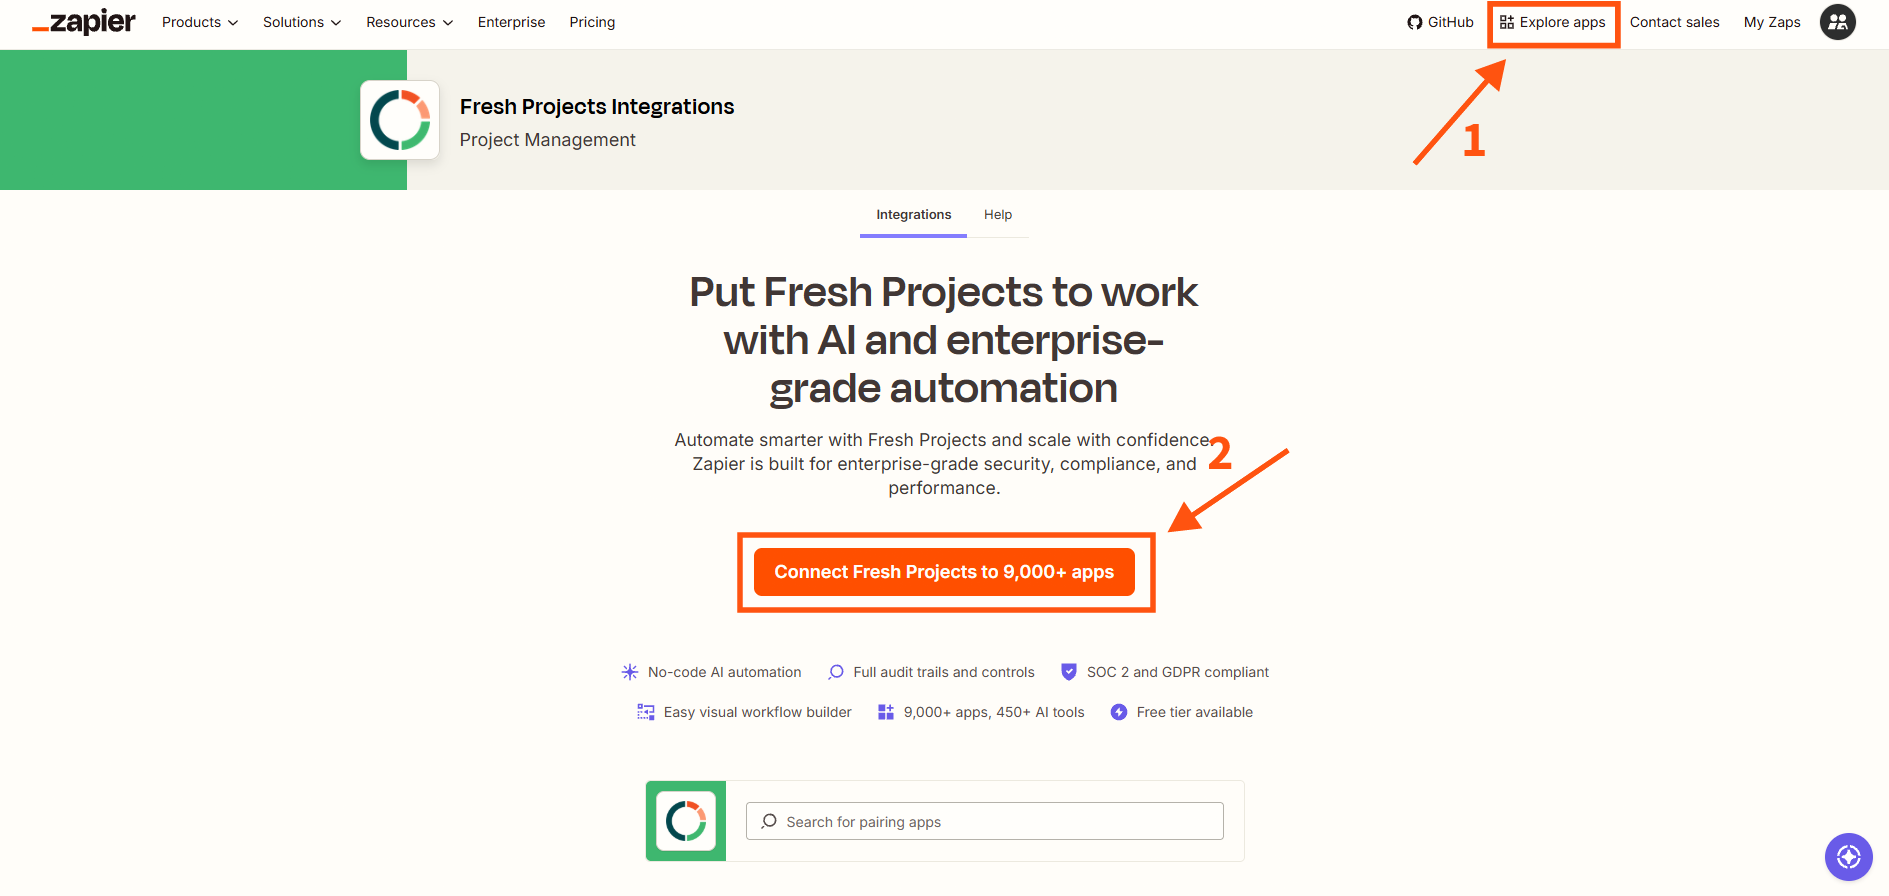
- Go to https://zapier.com/ and log in
- Under Explore Apps, search for Fresh Projects (or use https://zapier.com/apps/fresh-projects-ca1/integrations)
- Click Connect
- Because your account is already authorised, you can go straight on to building your Zap — choose your trigger and complete the setup
For more on building Zaps, see Zapier's guide on Creating your first Zap.
Alternative: connecting from the Zapier side
If you start in Zapier rather than in Fresh Projects, Zapier will prompt you to authorise your Fresh Projects account. When that prompt appears:
- In Fresh Projects, go to Integrations > Zapier > Manage and copy your API token
- Paste the token into the Zapier authorisation window
- Click Yes, Continue to complete the connection
Disconnecting Zapier
To disconnect, go to Settings > Integrations > Zapier (Manage) > Disconnect Zapier. The status indicator changes to a cross, and any Zaps relying on the connection will stop working until you reconnect.