Once expense costs have been set within the Budget & Fee section, the next step is to schedule out those costs during the lifetime of the project.
Let's take a look at how this is done:
- After opening the project, navigate to the Schedule.

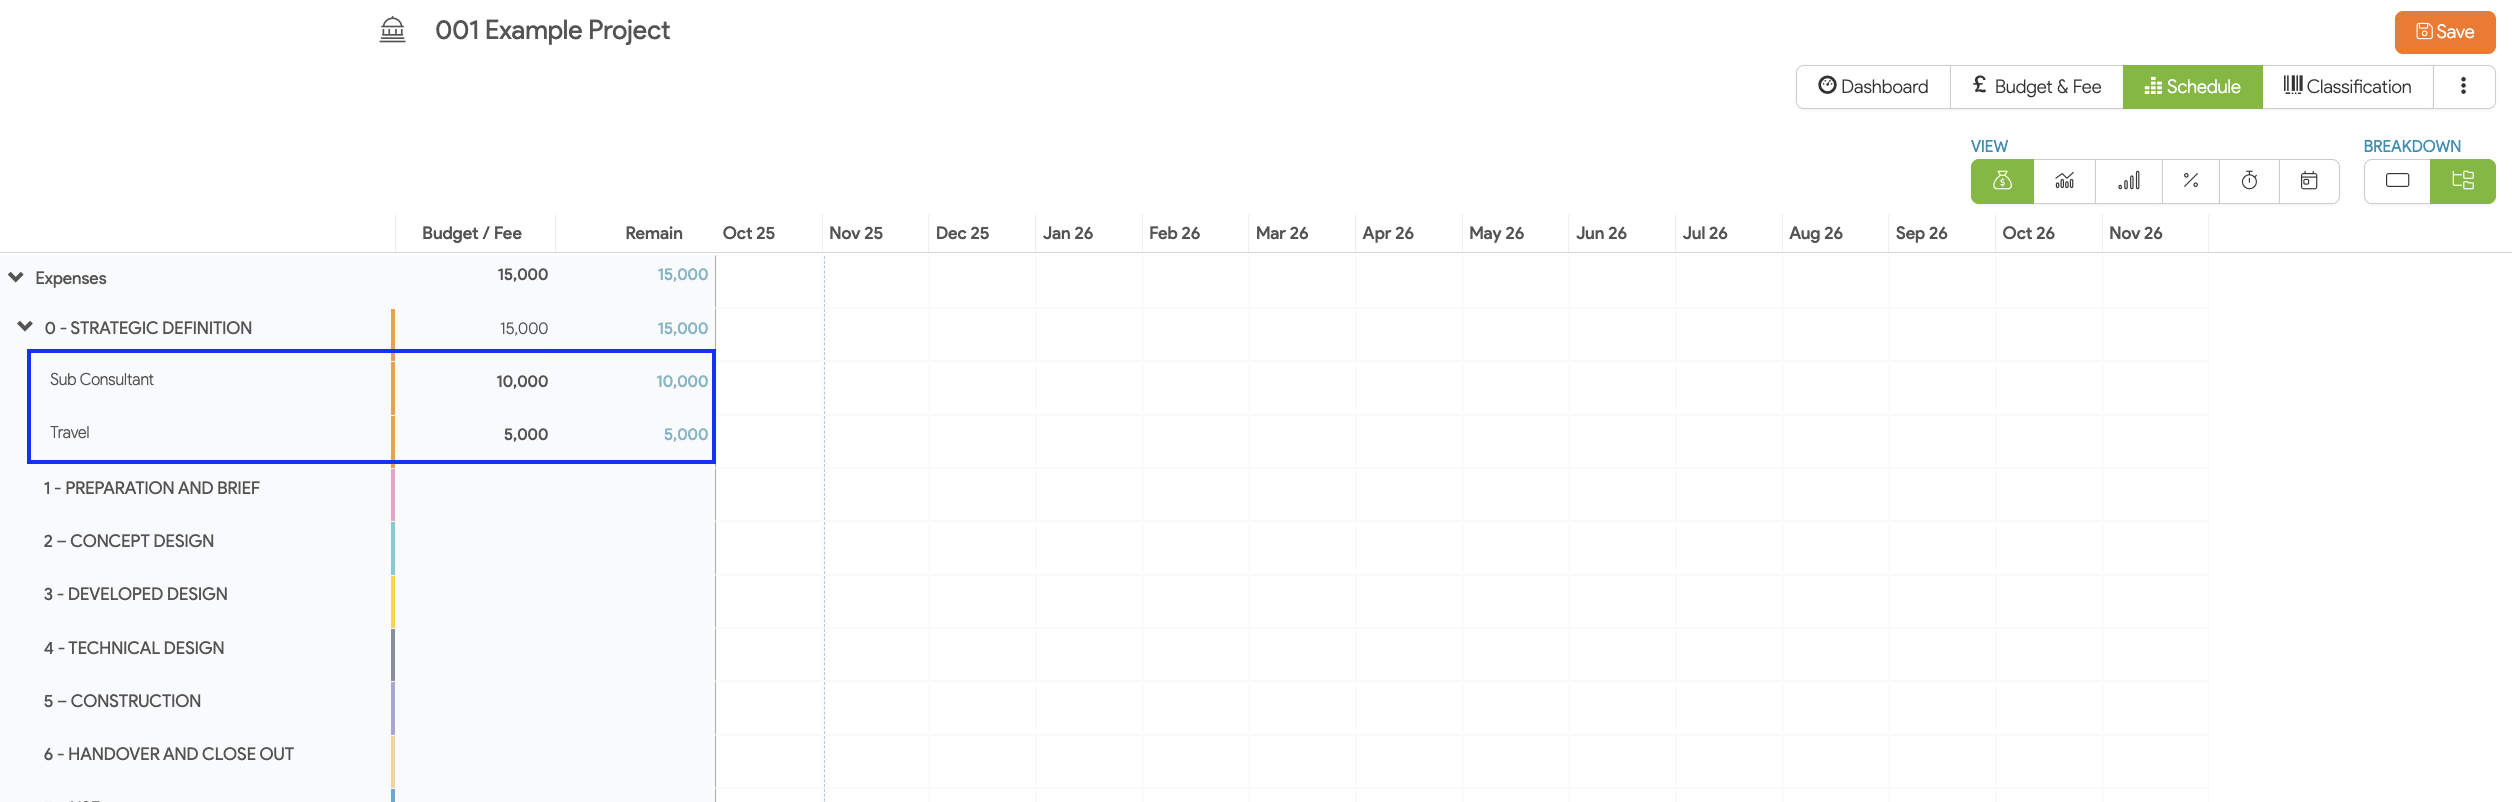
- Click on Expenses to expand the section. You will then be able to see the project stages.

- Next to each stage will be an indication of the cost allocated to it. To delve into further detail, set the Breakdown to Detailed.

- This will allow you to further break down the stages so that each assigned expense is shown in its own row.
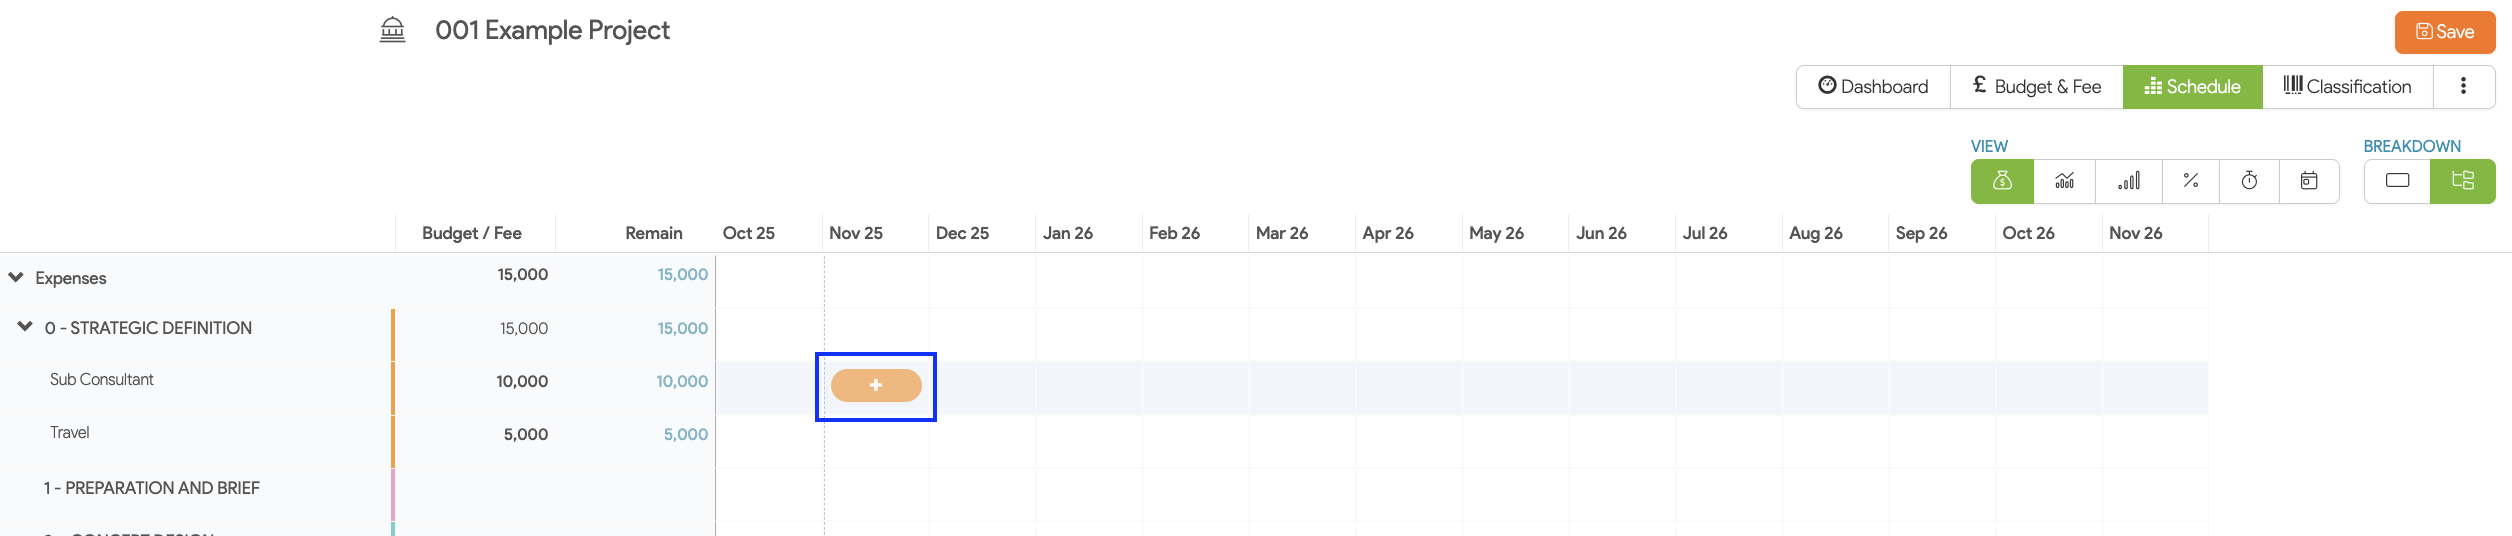
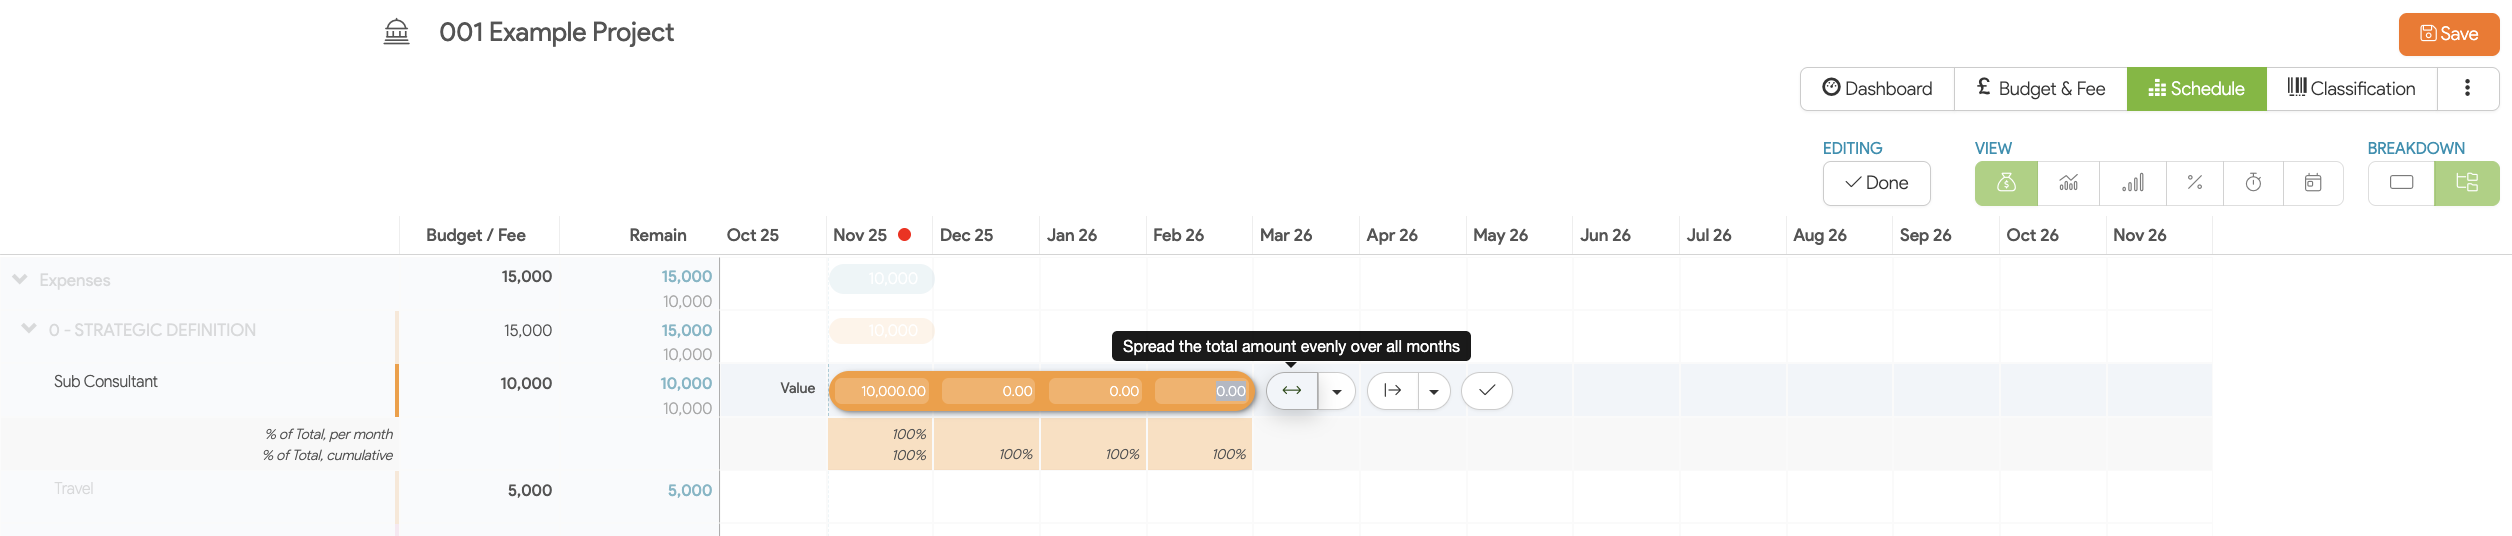
- Now to schedule out the expenditure, hover in the respective row beneath the planned starting month. As soon as the shadow of a bubble appears, click down in the desired cross section.
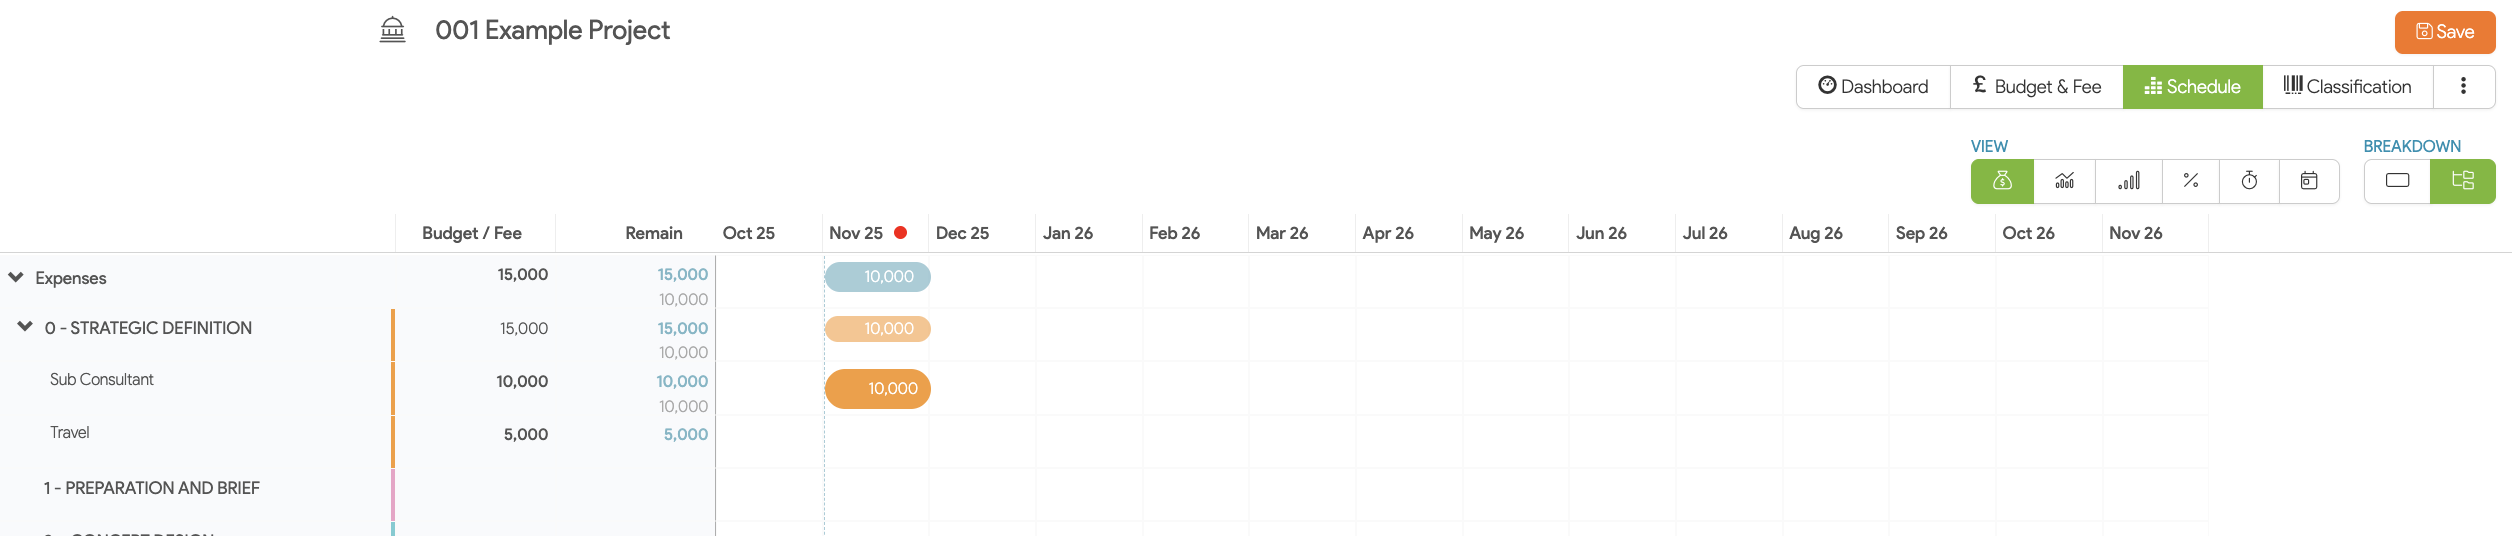
- The value that you see in the bubble is total amount set in the budget.
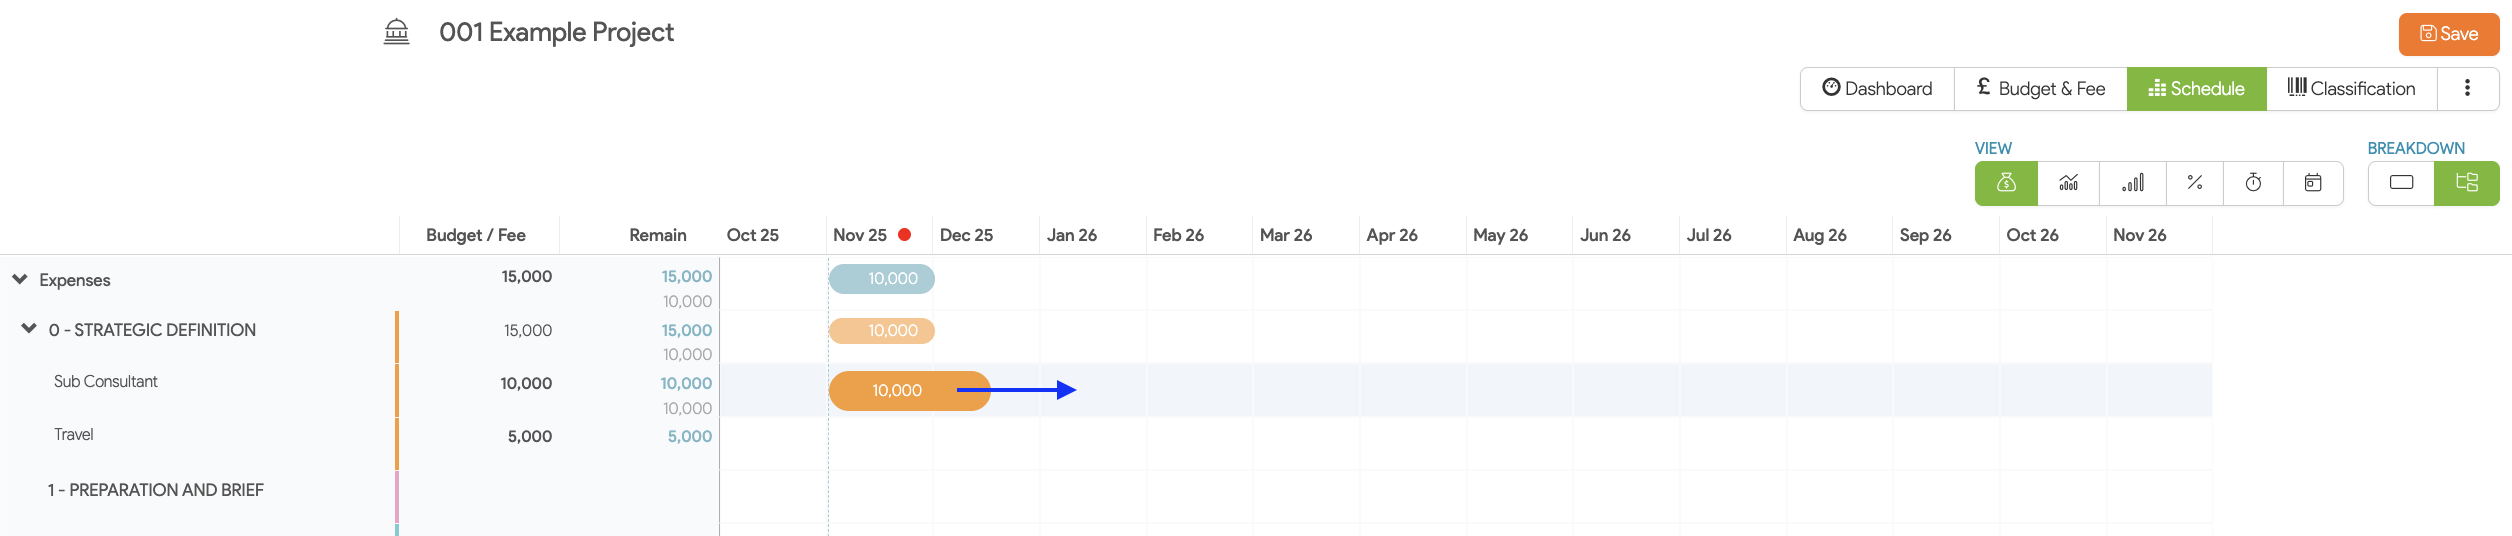
- To schedule out the expenses over multiple months, hover to the right of the bubble until the double-sided arrow appears. Now click and hold down while dragging it to encompass the additional months.
- Now, to equally spread the expenditure over the established months, click on the first double-sided arrow to the right of the bubble. Alternatively, you can manually override these values by typing inside the text box for each month. Once you're satisfied with the spread, click Done.
- Once you have scheduled out all expenses on all the project stages, Save your changes.

We hope this article was helpful. If you have any questions, please do not hesitate to reach out to us. Our support team is always happy to help!